You can build your code by installing Scala as a plug-in in IntelliJ. Installation process is based on IntelliJIdea2018.1.5 version.
Install Scala Plugin
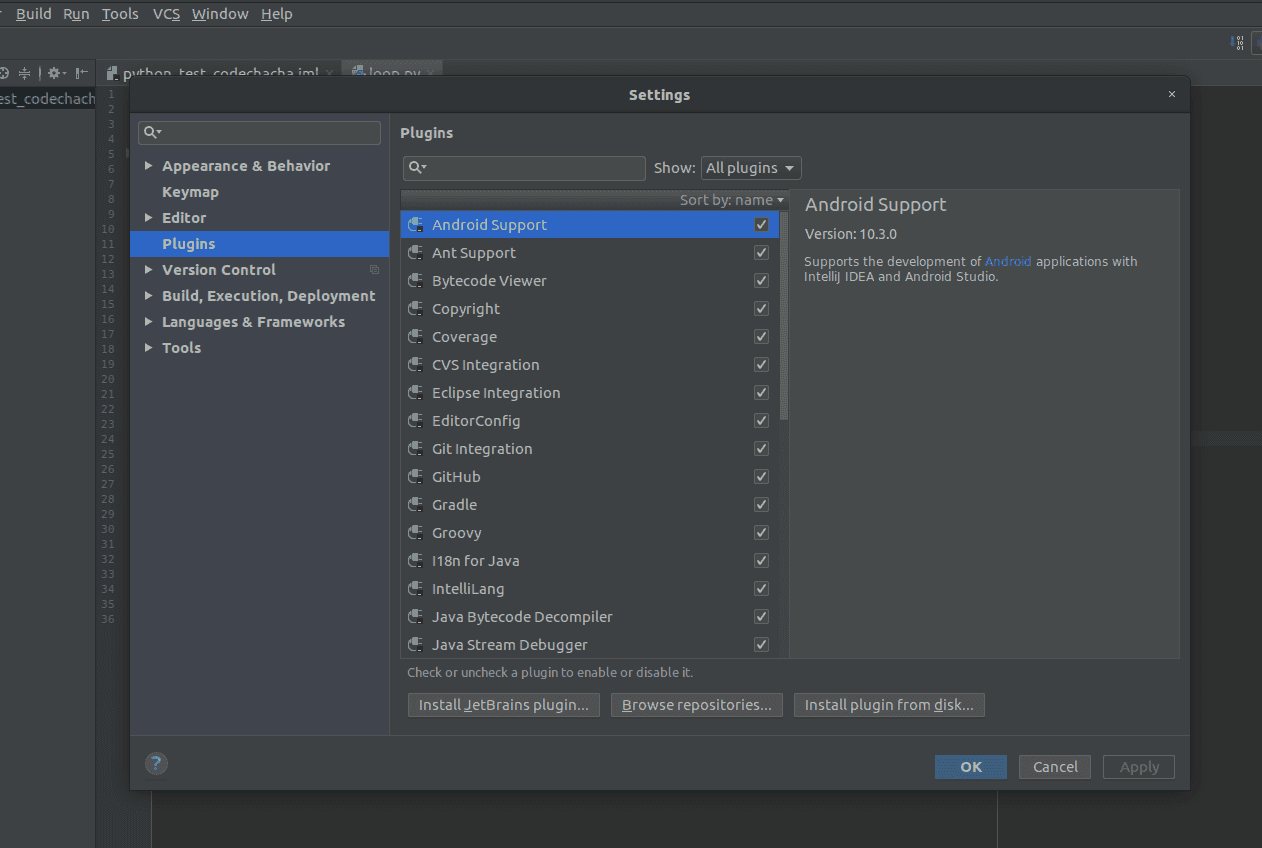
The plug-in opens IntelliJs menu [File]-> [Settings] and the Plugins menu is on the left tab.
When you press this menu, there is a Browse repositories` button at the bottom center. Click this button to bring up a screen where you can find and install Scala plugins.
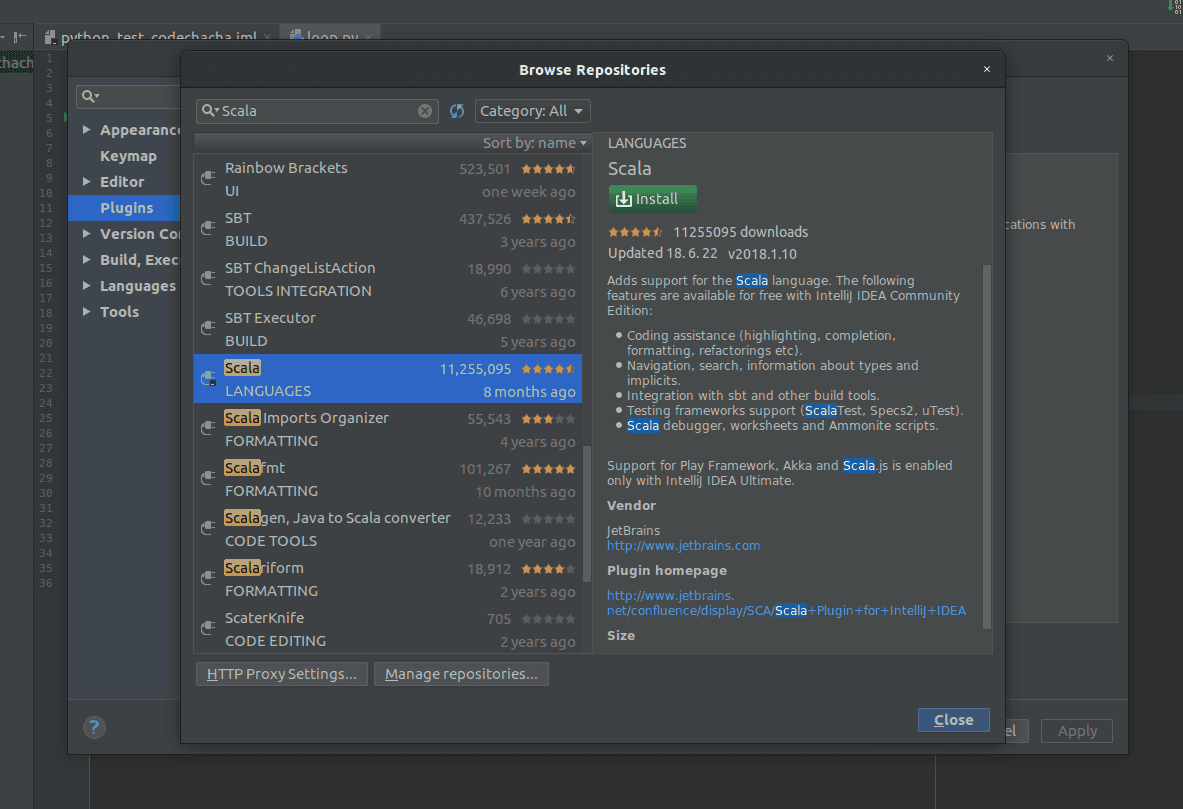
Enter Scala in the search box, select the screen and scalar below and click the Install button
Once Scala is installed, you must relaunch IntelliJ.
create scalar project
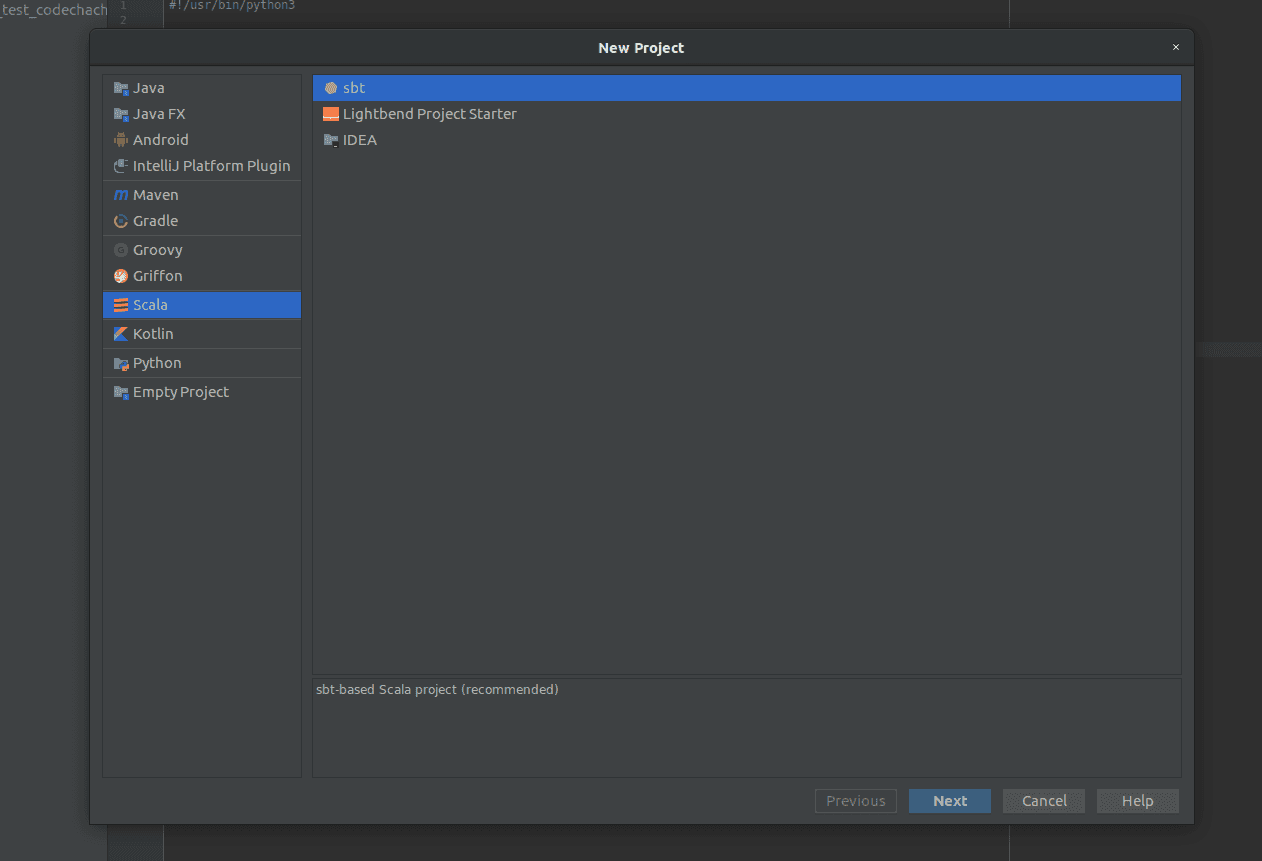
If the Scala plugin is installed, you can create a Scala project. Click [File]-> [New]-> [Project] on the menu.
Since we installed the plugin, we can see Scala on the left and create a project. Then select sbt (Simple Build Tool) on the right and click Next to complete the other settings.
The project has been created. You can also see the /src/main/scala folder created in the left tree.
Build and run sample code
Now let`s build and build the sample code and see if it works.
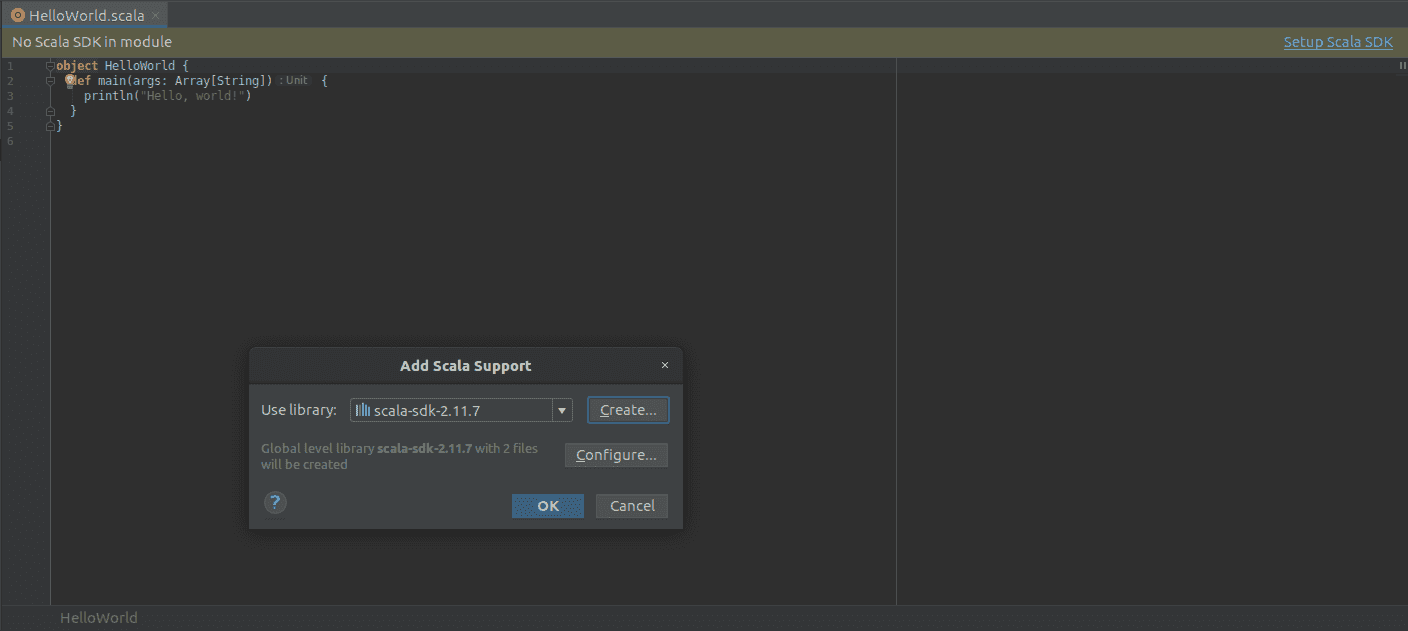
Add the /src/main/scala file under theHelloWorld.scala folder and enter the following code.
object HelloWorld {
  def main(args: Array[String]) {
    println("Hello, world!")
  }
}
I tried to build the code above but it doesn`t work. At the top of the code editor, you will be asked to configure the Scala SDK. I have set up the latest SDK by pressing the Setup Scala SDK button.
Now build and run the project.
You will see Hello, world! Displayed on the console window below.
Hello, world!

Process finished with exit code 0
Cleanup
I ran the code by installing the Scala plugin from IntelliJ IDEA, which is available for free.