AutoKey는 파이썬 스크립트를 실행해주는 프로그램(macro)입니다. 스크립트마다 Hot key를 지정할 수 있어서 특정 키를 눌렀을 때 특정 스크립트가 동작하도록 만들 수 있습니다.
AutoKey는 사용자의 동작을 기록하여 스크립트로 만들어주는 기능은 없습니다. AutoKey에서 제공하는 API를 이용하여 Python 스크립트를 직접 만들어야 합니다.
Python 코드 작성이 서툴다면 이 프로그램을 사용하는데 어려움이 있을 수 있습니다.
이 글의 내용은 Ubuntu 18.04에서 확인한 내용입니다.
설치
apt를 이용하여 AutoKey-gtk를 설치해야 합니다.
먼저 다음과 같이 repository를 설정하고 update를 합니다.
$ sudo add-apt-repository ppa:sporkwitch/autokey
$ sudo apt update
그리고 apt로 autokey-gtk를 설치합니다.
$ sudo apt install autokey-gtkUbuntu의 프로그램에서 AutoKey를 검색하면 실행 아이콘이 보입니다.
Script 등록
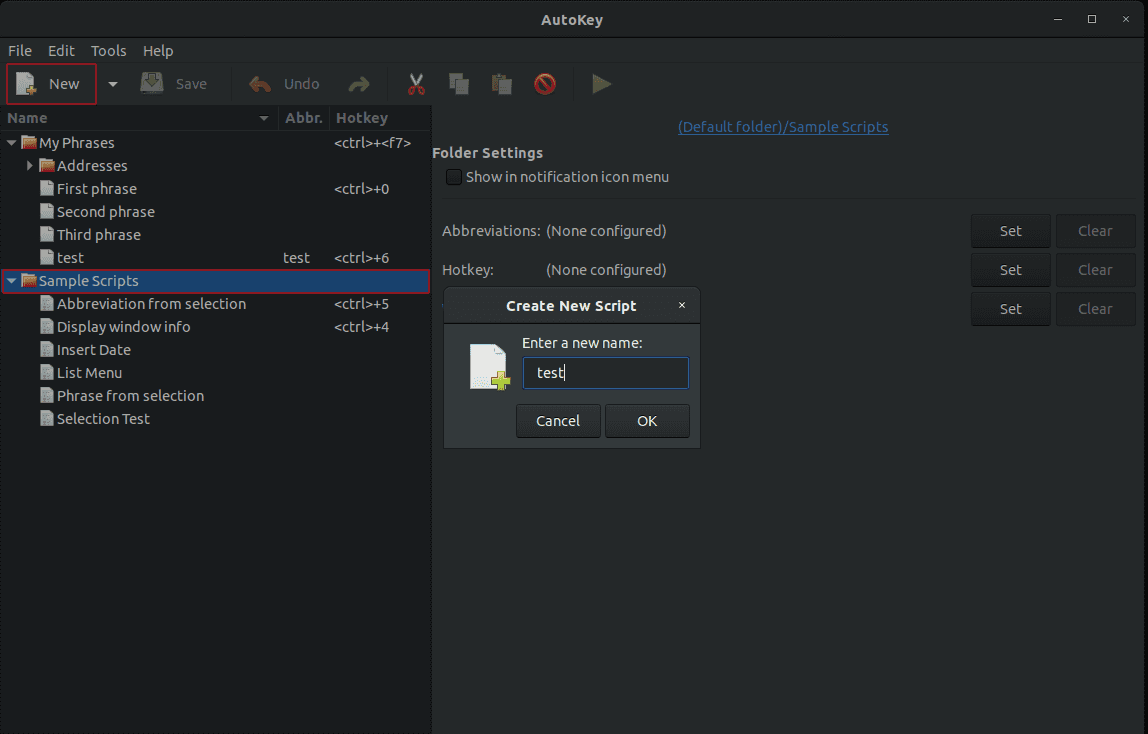
AutoKey를 실행하면 다음과 같은 화면이 보입니다. 왼쪽 폴더는 스크립트를 관리하는 디렉토리입니다.
Sample Script 폴더를 클릭하고 New 버튼을 눌러 스크립트 파일을 생성합니다.
오른쪽 에디터에 다음과 같은 내용을 입력합니다.
keyboard.send_keys("<div> </div>")keyboard.send_keys()는 인자로 전달된 key를 입력하는 API입니다.
위 스크립트가 실행되면, 키보드로 입력된 것처럼 다음과 같은 텍스트가 입력됩니다.
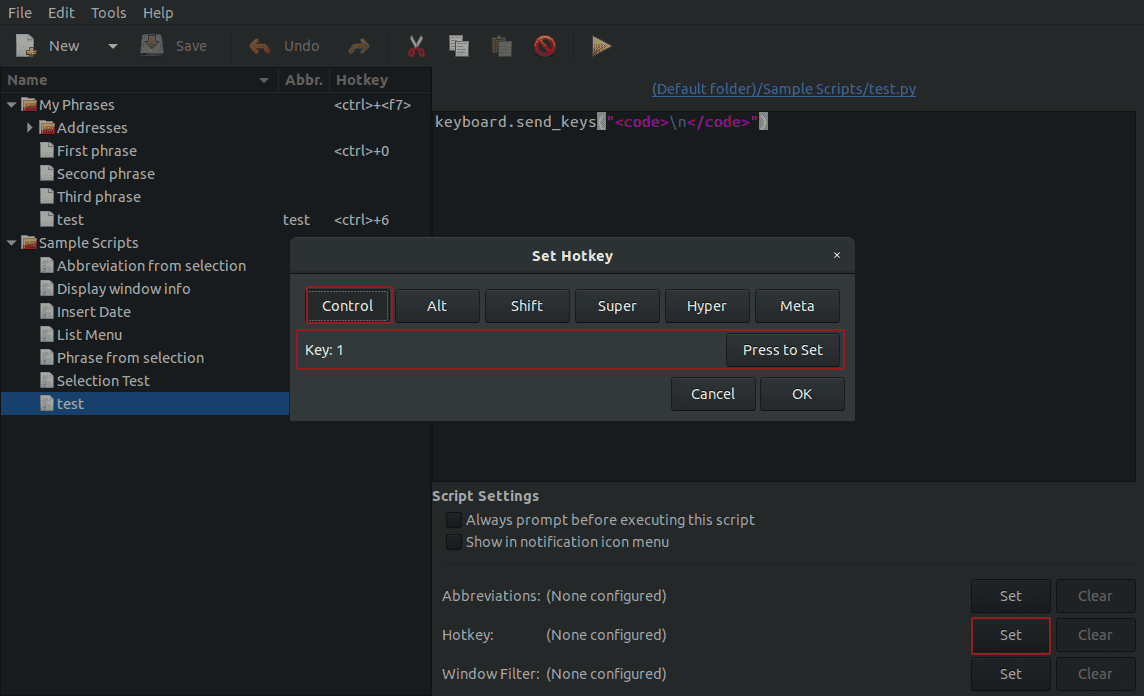
<div> </div>HotKey는 단축키로, 아래 그림처럼 Set 버튼을 눌러 설정할 수 있습니다. 저는 Ctrl + 1로 설정했습니다.
저장을 하시고 에디터에서 자신이 설정한 HotKey를 누르면 스크립트가 실행됩니다.
Clipboard 예제
Clipboard와 관련된 처리도 할 수 있습니다.
다음 스크립트는 현재 선택된 text를 삭제하고 다른 text와 함께 출력하는 예제입니다.
text = clipboard.get_selection()
keyboard.send_key("<delete>")
keyboard.send_keys("The text %s was here previously" % text)aaa를 선택하고 스크립트를 실행한 결과
The text aaa was here previouslyPersistent Value 예제
Persistent value는 삭제되지 않는, 전역변수와 같습니다.
다음 스크립트는 Persistent를 사용하는 예제입니다.
if not store.has_key("runs"):
    # Create the value on the first run of the script
    store.set_value("runs", 1)
else:
    # Otherwise, get the current value and increment it
    cur = store.get_value("runs")
    store.set_value("runs", cur + 1)
    keyboard.send_keys("I've been run %d times!\n" % store.get_value("runs"))
HotKey를 여러번 누르면 다음과 같이 출력됩니다.
I've been run 1 times!
I've been run 2 times!
I've been run 3 times!
I've been run 4 times!
Window 위치 이동 예제
다음 스크립트는 윈도우를 왼쪽으로 이동시키는 예제입니다.
# move active window left
thisWin = window.get_active_title()
windetails = window.get_active_geometry() # returns tuple of: x, y, width, height
newX = windetails[0] - 40
window.resize_move(thisWin, xOrigin=newX, yOrigin=-1, width=-1, height=-1, matchClass=False)
더 많은 예제들
autokey - scripting을 보시면 더 많은 예제들이 많이 있습니다. 이 예제들을 응용하면 필요한 것은 거의 구현할 수 있을 것 같습니다.
참고
Related Posts
- Ubuntu/Linux - 특정 이름이 들어간 파일 모두 찾고 삭제하기
- Ubuntu/Linux - 특정 이름이 포함된 프로세스 모두 종료
- Ubuntu/Linux - 사용자 계정 이름 확인 (id, whoami)
- Ubuntu/Linux - E: unable to locate package 에러 해결
- Ubuntu 22.04/20.04 - Yarn 설치 방법
- Linux/Ubuntu - grep 명령어로 문자열 검색
- Linux/Ubuntu - 터미널에서 seq로 명령어 N회 반복
- Linux/Ubuntu - wc 명령어로 Line(줄) 개수 세기
- bash: pip: command not found 문제 해결 (Linux/Ubuntu)
- Ubuntu 22.04 - Swap 메모리 늘리기
- Linux - 파일이 수정된 날짜/시간 확인 방법
- Linux - 파일, 디렉토리 삭제 명령어(rm -rf, rmdir)
- 우분투 22.04 - deb 파일 설치하기
- Ubuntu 20.04 - OpenJDK 11 설치, 삭제
- Linux - ps 명령어로 실행 중인 프로세스(PID) 확인
- Ubuntu 20.04 - SSH 설치와 접속 방법
- Ubuntu에서 PPA 저장소 추가, 제거 방법
- Ubuntu 22.04 - Brave 브라우저 설치
- Ubuntu 22.04 - 프로스트와이어(FrostWire) 설치
- Ubuntu 22.04 - Remmina 설치 방법
- Ubuntu 22.04 - 텔레그램 설치하기
- Ubuntu 22.04 - Rust 설치하기
- Ubuntu - Deluge 토렌트 클라이언트 설치
- Ubuntu JDK 17 (OpenJDK) 설치, 삭제
- Ubuntu 20.04 스팀(Steam) 설치 방법
- Ubuntu에서 draw.io 설치하는 방법
- 우분투에 VMware 설치하기
- [Ubuntu] VMware에서 Windows 11 설치
- Vi/Vim에서 1줄 또는 여러줄 삭제 방법
- Vi/Vim에서 라인 번호 표시하��기
- 우분투에서 rar 압축, 압축 풀기
- Ubuntu에서 구글 드라이브 사용하기 (로컬 폴더에 마운트)
- [Ubuntu] apt-cache search, 설치 가능한 패키지 검색
- Ubuntu - DNS 캐시 삭제 방법
- Ubuntu에서 사용할 수 있는 Text Editor 소개