PreferenceFragment는 아래와 같은 설정화면을 쉽게 구현해주는 컴포넌트입니다. 매우 적은 코드와 간단한 XML 레이아웃 코드를 추가하여 구현할 수 있습니다. 어떻게 PreferenceFragment를 사용하는지 알아보겠습니다.
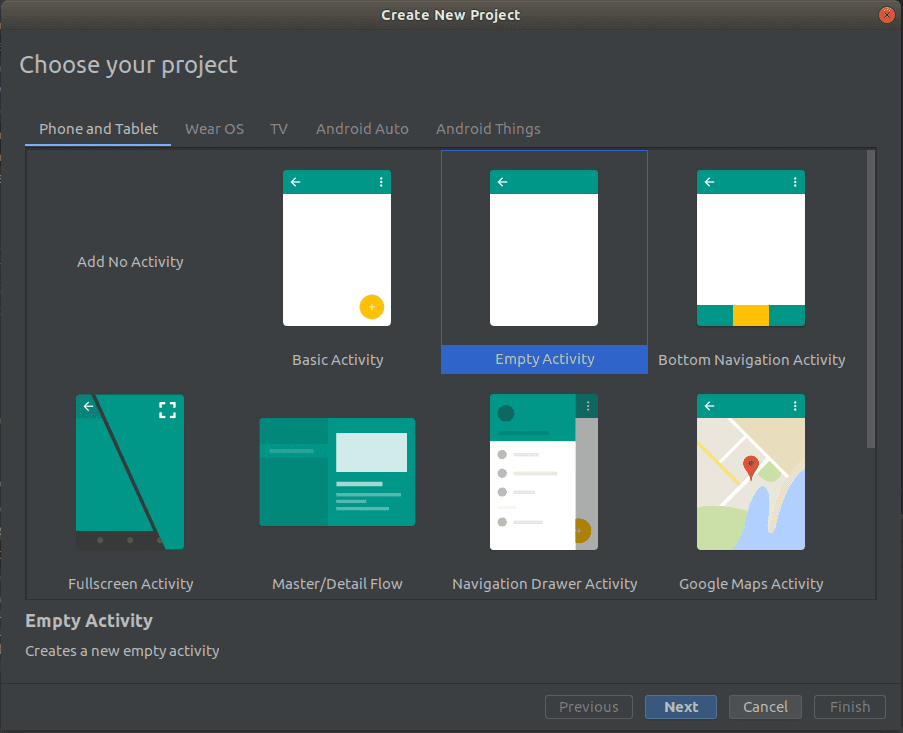
프로젝트 생성
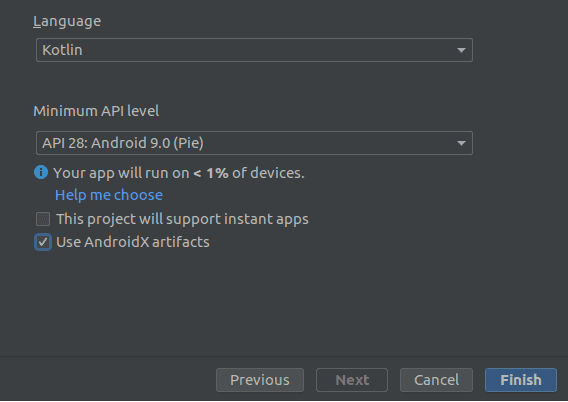
Kotlin과 Use AndroidX artifacts를 선택해주세요.(Android Studio 버전이 3.4 미만이라면 Use AndroidX artifacts옵션이 없습니다. 마이그레이션을 하거나 코드를 변경해줘야 합니다)

AndroidX로 프로젝트를 생성하지 않았다면, 메뉴에서 [Refactor] -> [Migrate to AndroidX...] 를 누르시면 AndroidX를 사용하는 프로젝트로 마이그레이션이 됩니다.
앱 gradle에서 다음과 같이 dependency를 추가해야 합니다.
dependencies {
  ....
  implementation 'androidx.preference:preference:1.1.0-alpha01'
}
PreferenceFragment 구현
PreferenceFragmentCompat을 사용하여 MainPreference를 구현합니다.
addPreferencesFromResource는 레이아웃을 생성하는 함수인데, 메뉴에 대한 XML파일을 인자로 주면 View를 생성합니다.
class MainPreference : PreferenceFragmentCompat() {
    override fun onCreatePreferences(savedInstanceState: Bundle?, rootKey: String?) {
        addPreferencesFromResource(R.xml.preferences)
    }
}
위에서 사용한, 메뉴를 정의한 XML파일을 만들어야 합니다. 이 파일은 View를 생성하는데 사용됩니다.
CheckBoxPreference는 이름처럼 체크박스에 대한 view입니다. 다른 것들도 각각의 역할이 다른 view입니다.
<?xml version="1.0" encoding="utf-8"?>
<PreferenceScreen xmlns:android="http://schemas.android.com/apk/res/android"
                  xmlns:app="http://schemas.android.com/apk/res-auto"
                  android:iconSpaceReserved="false">
    <PreferenceCategory
            android:title="Functions"
            app:iconSpaceReserved="false">

        <CheckBoxPreference
                android:key="key_add_shortcut"
                android:title="Add shortcuts"
                android:icon="@mipmap/ic_launcher"
                android:defaultValue="true"/>

        <SwitchPreference
                android:key="key_switch_on"
                android:title="Screen on"
                android:icon="@mipmap/ic_launcher"
                android:defaultValue="false"/>

    </PreferenceCategory>

    <PreferenceCategory
            android:title="Options"
            app:iconSpaceReserved="false">

        <EditTextPreference
            android:key="key_edit_name"
            android:title="Edit name"
            android:summary="Edit your name"
            android:dialogTitle="Edit your name"
            app:iconSpaceReserved="false"/>

        <ListPreference
            android:key="key_set_item"
            android:title="Main action"
            android:summary="set main action"
            android:entries="@array/action_list"
            android:entryValues="@array/action_values"
            android:dialogTitle="set main action"
            app:iconSpaceReserved="false"/>

        <PreferenceScreen
                android:title="Go to android.com"
                android:summary="browse android.com"
                app:iconSpaceReserved="false">
            <intent android:action="android.intent.action.VIEW"
                    android:data="http://www.android.com" />
        </PreferenceScreen>

    </PreferenceCategory>

</PreferenceScreen>arrays.xml파일을 생성하여 preferences.xml에서 사용하는 arrays도 정의해줍니다.
<?xml version="1.0" encoding="utf-8"?>
<resources>
    <string-array name="action_list">
        <item>action 1</item>
        <item>action 2</item>
        <item>action 3</item>
        <item>action 4</item>
    </string-array>
    <string-array name="action_values">
        <item>value 1</item>
        <item>value 2</item>
        <item>value 3</item>
        <item>value 4</item>
    </string-array>
</resources>
이제 PreferenceFragment는 모두 구현하였습니다. MainActivity에서 이 프래그먼트가 보이도록 설정해야합니다.
아래처럼 activity_main을 수정합니다. 프래그먼트를 정의하였고, name에 우리가 만든 PreferenceFragment를 설정하였습니다.
이렇게 하면 액티비티가 생성될 때 저 위치에 MainPreference가 생성됩니다.
<?xml version="1.0" encoding="utf-8"?>
<androidx.constraintlayout.widget.ConstraintLayout
        xmlns:android="http://schemas.android.com/apk/res/android"
        xmlns:tools="http://schemas.android.com/tools"
        xmlns:app="http://schemas.android.com/apk/res-auto"
        android:layout_width="match_parent"
        android:layout_height="match_parent"
        tools:context=".MainActivity">

    <fragment
        android:id="@+id/main_pref"
        android:name="com.codechacha.preference.MainPreference"
        android:layout_width="match_parent"
        android:layout_height="match_parent"
        app:layout_constraintBottom_toBottomOf="parent"
        app:layout_constraintLeft_toLeftOf="parent"
        app:layout_constraintRight_toRightOf="parent"
        app:layout_constraintTop_toTopOf="parent"/>

</androidx.constraintlayout.widget.ConstraintLayout>
이제 앱을 빌드하고 실행해보면 설정 화면을 볼 수 있습니다.
다른 방법으로 PreferenceFragment 설정
Layout에서 PreferenceFragment를 설정하지 않고 코드로 설정하는 방법도 있습니다.
다른 코드들은 모두 동일하지만, 다음과 같이 activity_main.xml의 fragment는 FrameLayout으로 변경해야 합니다. 또한, android:name 속성도 삭제합니다.
<?xml version="1.0" encoding="utf-8"?>
<androidx.constraintlayout.widget.ConstraintLayout
        xmlns:android="http://schemas.android.com/apk/res/android"
        xmlns:tools="http://schemas.android.com/tools"
        xmlns:app="http://schemas.android.com/apk/res-auto"
        android:layout_width="match_parent"
        android:layout_height="match_parent"
        tools:context=".MainActivity">

    <FrameLayout
        android:id="@+id/main_pref"
        android:layout_width="match_parent"
        android:layout_height="match_parent"
        app:layout_constraintBottom_toBottomOf="parent"
        app:layout_constraintLeft_toLeftOf="parent"
        app:layout_constraintRight_toRightOf="parent"
        app:layout_constraintTop_toTopOf="parent"/>

</androidx.constraintlayout.widget.ConstraintLayout>
그리고 MainActivity에서 supportFragmentManager를 이용하여 PreferenceFragment를 실행하면 됩니다.
class MainActivity : AppCompatActivity() {

    override fun onCreate(savedInstanceState: Bundle?) {
        super.onCreate(savedInstanceState)
        setContentView(R.layout.activity_main)

        supportFragmentManager
            .beginTransaction()
            .replace(R.id.main_pref, MainPreference())
            .commit()
    }
}
출력되는 결과는 동일합니다.
속성
코드만 붙여 넣고 동작을 확인해보았습니다. 중요한 것은 레이아웃과 관련이 있는 preferences.xml입니다.
체크박스를 만드려면 아래 객체와 속성을 사용해야 합니다. key는 매우 중요합니다. 체크박스의 on/off는 객체 내부에서 저장되도록 구현이 되어있습니다.
따라서 저장하는 부분을 따로 구현할 필요가 없습니다. 대신, 어떤 값이 저장되어있는지 읽을 수 있어야하는데요, 이 key를 통하여 값을 읽을 수 있습니다.
icon은 아이콘의 위치를 말합니다. icon을 설정하지 않으면 아이콘 영역이 빈 공간으로 남을 수 있습니다.
defaultValue는 초기 값을 의미합니다.
<CheckBoxPreference
        android:key="key_add_shortcut"
        android:title="Add shortcuts"
        android:icon="@mipmap/ic_launcher"
        android:defaultValue="true"/>
스위치를 만드려면 아래 객체와 속성을 사용해야 합니다. 속성의 의미는 위와 모두 동일합니다.
<SwitchPreference
        android:key="key_switch_on"
        android:title="Screen on"
        android:icon="@mipmap/ic_launcher"
android:defaultValue="false"/>PreferenceCategory는 카테고리로, 공통된 Preference들을 묶어주는 역할입니다. 앱을 보면 붉은색으로 타이틀이 적혀있습니다.
iconSpaceReserved=false는 아이콘을 위해 할당된 공간을 없애라는 의미입니다. 이 속성을 추가하지 않으면 아이콘 공간이 남아있어 왼쪽으로 패딩이 있는 것처럼 보입니다.
<PreferenceCategory
        android:title="Functions"
        app:iconSpaceReserved="false">

</PreferenceCategory>
텍스트를 입력할 수 있는 Preference입니다.
<EditTextPreference
    android:key="key_edit_name"
    android:title="Edit name"
    android:summary="Edit your name"
    android:dialogTitle="Edit your name"
    app:iconSpaceReserved="false"/>
주어진 리스트 중 1개를 선택할 수 있는 Preference입니다.
<ListPreference
    android:key="key_set_item"
    android:title="Main action"
    android:summary="set main action"
    android:entries="@array/action_list"
    android:entryValues="@array/action_values"
    android:dialogTitle="set main action"
    app:iconSpaceReserved="false"/>
다른 화면으로 넘어가는 Preference입니다. intent 인자를 주어 브라우저가 android.com을 열도록 하였습니다.
<PreferenceScreen
        android:title="Go to android.com"
        android:summary="browse android.com"
        app:iconSpaceReserved="false">
    <intent android:action="android.intent.action.VIEW"
            android:data="http://www.android.com" />
</PreferenceScreen>
이 외에도 다른 Preference가 있고, 커스텀하여 만들 수 있습니다.
설정 값 읽기
XML 레이아웃을 조금 추가하면 쉽게 Preference 화면을 만들 수 있습니다. 그리고 각각의 Preference를 설정하면 자동으로 옵션이 저장됩니다.
저장된 옵션을 읽으려면 key를 이용해야 합니다. 먼저 PreferenceManager에서 getDefaultSharedPreferences로 SharedPreference를 가져옵니다.
저장된 데이터가 boolean인 경우 getBoolean(key, default) 처럼 값을 가져올 수 있습니다. 초기값이 없는 경우 default로 설정한 것을 가져오게 됩니다.
문자열의 경우 getString을 사용합니다. Int와 Long, Float도 모두 동일한 방식으로 가져오면 됩니다.
val sps = PreferenceManager.getDefaultSharedPreferences(this)
val addShortcut = sps.getBoolean("key_add_shortcut", false)
val screenOn = sps.getBoolean("key_switch_on", false)
val editName = sps.getString("key_edit_name", "")
참고
- 샘플 코드는 GitHub에 있습니다
- PreferenceFragment - Android developer
Related Posts
- Android 14 - 사진/동영상 파일, 일부 접근 권한 소개
- Android - adb push, pull로 파일 복사, 다운로드
- Android 14 - 암시적 인텐트 변경사항 및 문제 해결
- Jetpack Compose - Row와 Column
- Android 13, AOSP 오픈소스 다운로드 및 빌드
- Android 13 - 세분화된 미디어 파일 권한
- Android 13에서 Notification 권한 요청, 알림 띄우기
- Android 13에서 'Access blocked: ComponentInfo' 에러 해결
- 에러 해결: android gradle plugin requires java 11 to run. you are currently using java 1.8.
- 안드로이드 - 코루틴과 Retrofit으로 비동기 통신 예제
- 안드로이드 - 코루틴으로 URL 이미지 불러오기
- Android - 진동, Vibrator, VibrationEffect 예제
- Some problems were found with the configuration of task 에러 수정
- Query method parameters should either be a type that can be converted into a database column or a List
- 우분투에서 Android 12 오픈소스 다운로드 및 빌드
- Android - ViewModel을 생성하는 방법
- Android - Transformations.map(), switchMap() 차이점
- Android - Transformations.distinctUntilChanged() 소개
- Android - TabLayout 구현 방법 (+ ViewPager2)
- Android - 휴대폰 전화번호 가져오는 방법
- Android 12 - Splash Screens 알아보기
- Android 12 - Incremental Install (Play as you Download) 소개
- Android - adb 명령어로 bugreport 로그 파일 추출
- Android - adb 명령어로 App 데이터 삭제
- Android - adb 명령어로 앱 비활성화, 활성화
- Android - adb 명령어로 특정 패키지의 PID 찾기
- Android - adb 명령어로 퍼미션 Grant 또는 Revoke
- Android - adb 명령어로 apk 설치, 삭제
- Android - adb 명령어로 특정 패키지의 프로세스 종료
- Android - adb 명령어로 screen capture 저장
- Android - adb 명령어로 System 앱 삭제, 설치
- Android - adb 명령어로 settings value 확인, 변경
- Android 12 - IntentFilter의 exported 명시적 선언
- Android - adb 명령어로 공장초기화(Factory reset)
- Android - adb logcat 명령어로 로그 출력

