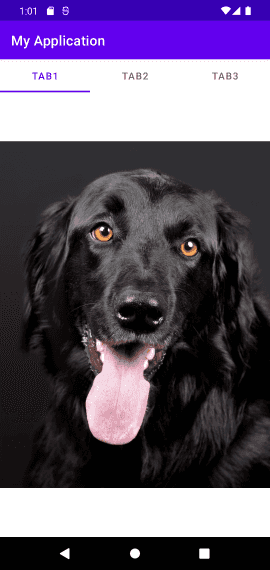
TabLayout은 아래 이미지와 같이 Tab을 눌렀을 때 각각 다른 페이지를 보여주는 레이아웃입니다. 상단에 Tab 버튼이 보이며, 이 버튼을 누르면 가운데 페이지가 변경됩니다.
TabLayout과 ViewPager2를 이용하면, Tab을 눌렀을 때 다른 페이지가 보이는 기능을 쉽게 구현할 수 있습니다. ViewPager2는 Swipe하여 페이지를 넘기는 UI를 구현하는데 사용되는 클래스로, 기존에 있던 ViewPager의 개선된 버전입니다. 예제를 통해서 자세히 알아보겠습니다.
이 글에서 소개하는 예제는 GitHub - TabLayoutExample에 업로드했습니다. 설명이 부족한 부분은 전체 코드를 참고해주세요.
1. 의존성 추가
ViewPager2와 TabLayout을 사용하기 위해 gradle에 다음과 같이 의존성을 추가합니다.
dependencies {
    ...

    implementation 'com.google.android.material:material:1.4.0'
}
2. Layout 구성
먼저 기본 프로젝트를 만드시고 MainActivity의 layout인 activity_main.xml을 다음과 같이 변경합니다.
<?xml version="1.0" encoding="utf-8"?>
<LinearLayout xmlns:android="http://schemas.android.com/apk/res/android"
    xmlns:app="http://schemas.android.com/apk/res-auto"
    xmlns:tools="http://schemas.android.com/tools"
    android:layout_width="match_parent"
    android:layout_height="match_parent"
    android:orientation="vertical"
    tools:context=".MainActivity">

    <com.google.android.material.tabs.TabLayout
        android:id="@+id/tabLayout"
        android:layout_width="match_parent"
        android:layout_height="wrap_content" />

    <androidx.viewpager2.widget.ViewPager2
        android:id="@+id/viewPager"
        android:layout_width="match_parent"
        android:layout_height="0dp"
        android:layout_weight="1" />

</LinearLayout>- 간편한 설명을 위해 LinearLayout으로 변경
- TabLayout과 ViewPager2를 추가
3. Fragment 추가
Tab을 눌렀을 때 보여지는 화면은 Fragment로 구현할 것입니다. 3개의 Tab을 추가할 것이기 때문에 3개의 Fragment를 준비해야합니다.
Tab1Fragment.java라는 이름으로 아래와 같이 구현하였습니다.
package com.example.myapplication

import android.os.Bundle
import android.view.LayoutInflater
import android.view.View
import android.view.ViewGroup
import androidx.fragment.app.Fragment
import com.example.myapplication.databinding.Tab1FragmentBinding

class Tab1Fragment : Fragment() {
    private lateinit var binding: Tab1FragmentBinding

    override fun onCreateView(
        inflater: LayoutInflater,
        container: ViewGroup?,
        savedInstanceState: Bundle?
    ): View? {
        binding = Tab1FragmentBinding.inflate(inflater, container, false)
        return binding.root
    }
}
layout 파일 tab_1_fragment.xml은 다음과 같이 구현합니다.
<?xml version="1.0" encoding="utf-8"?>
<androidx.constraintlayout.widget.ConstraintLayout xmlns:android="http://schemas.android.com/apk/res/android"
    xmlns:app="http://schemas.android.com/apk/res-auto"
    xmlns:tools="http://schemas.android.com/tools"
    android:layout_width="match_parent"
    android:layout_height="match_parent"
    tools:context=".Tab1Fragment">

    <ImageView
        android:id="@+id/imageViewCat"
        android:layout_width="wrap_content"
        android:layout_height="wrap_content"
        android:src="@drawable/dog1"
        app:layout_constraintBottom_toBottomOf="parent"
        app:layout_constraintEnd_toEndOf="parent"
        app:layout_constraintHorizontal_bias="0.5"
        app:layout_constraintStart_toStartOf="parent"
        app:layout_constraintTop_toTopOf="parent" />

</androidx.constraintlayout.widget.ConstraintLayout>- Tab2, Tab3에 대한 파일들도 위와 비슷하게 만들면 됩니다.
- View Binding을 이용하여 kotlin에서 layout에 선언된 객체에 접근하였습니다.
- 각각의 Fragment는 간단히 이미지 1개를 보여줍니다.
참고로, View Binding을 사용하려면 App gradle에 다음과 같이 설정해야 합니다.
android {
    buildFeatures {
        viewBinding = true
    }
4. ViewPager Adapter 구현
FragmentStateAdapter를 상속하는 ViewPager Adapter를 다음과 같이 구현하였습니다. Adapter는 전체 Tab의 개수와 어떤 Tab을 눌렀을 때 어떤 Fragment가 생성되어야하는지에 대한 구체적인 내용이 구현되어있습니다.
package com.example.myapplication

import androidx.fragment.app.Fragment
import androidx.fragment.app.FragmentManager
import androidx.lifecycle.Lifecycle
import androidx.viewpager2.adapter.FragmentStateAdapter

private const val NUM_TABS = 3

class ViewPagerAdapter(fragmentManager: FragmentManager, lifecycle: Lifecycle) :
        FragmentStateAdapter(fragmentManager, lifecycle) {

    override fun getItemCount(): Int {
        return NUM_TABS
    }

    override fun createFragment(position: Int): Fragment {
        when (position) {
            0 -> return Tab1Fragment()
            1 -> return Tab2Fragment()
            2 -> return Tab3Fragment()
        }
        return Tab3Fragment()
    }
}
5. TabLayout 구현
MainActivity에는 TabLayout과 ViewPager2를 연동하는 구현이 있습니다.
package com.example.myapplication

import android.os.Bundle
import androidx.appcompat.app.AppCompatActivity
import com.example.myapplication.databinding.ActivityMainBinding
import com.google.android.material.tabs.TabLayoutMediator

class MainActivity : AppCompatActivity() {

    private lateinit var binding: ActivityMainBinding
    private val tabTitleArray = arrayOf(
        "Tab1",
        "Tab2",
        "Tab3"
    )

    override fun onCreate(savedInstanceState: Bundle?) {
        super.onCreate(savedInstanceState)
        binding = ActivityMainBinding.inflate(layoutInflater)
        setContentView(binding.root)

        val viewPager = binding.viewPager
        val tabLayout = binding.tabLayout

        viewPager.adapter = ViewPagerAdapter(supportFragmentManager, lifecycle)

        TabLayoutMediator(tabLayout, viewPager) { tab, position ->
            tab.text = tabTitleArray[position]
        }.attach()
    }

}- View Binding을 이용하여 TabLayout과 ViewPager2 객체에 접근합니다.
- ViewPager에 위에서 만든 Adapter를 설정합니다.
- TabLayoutMediator는 TabLayout과 ViewPager2를 연동을 도와주는 객체입니다. 위와 같이 인자로 TabLayout과 ViewPager2 객체를 전달하고
attach()를 호출하면 연동이 됩니다. 구현된 인터페이스는 Tab을 눌렀을 때, 선택된 Tab의 title을 설정하는 코드입니다.
GitHub - TabLayoutExample에서 샘플 프로젝트를 확인할 수 있습니다. 이미지 파일이나 자세한 코드를 확인하실 수 있습니다.
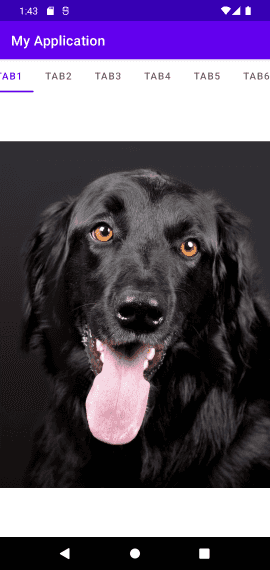
6. Scrollable
Tab이 많으면 Tab의 Title이 잘 보이지 않을 수 있습니다. 이럴 때 TabLayout을 Scrollable로 설정하면 다음과 같이 일부분의 Tab이 보이며, Tab 위치에서 Swipe하면 다른 Tab이 보입니다.
Scrollable로 설정하는 방법은 다음과 같이 TabLayout에서 tabMode를 scrollable로 설정하면 됩니다. (기본값은 fixed로, 위의 예제처럼 Tab들이 고정되어있습니다.)
<com.google.android.material.tabs.TabLayout
android:id="@+id/tabLayout"
android:layout_width="match_parent"
android:layout_height="wrap_content"
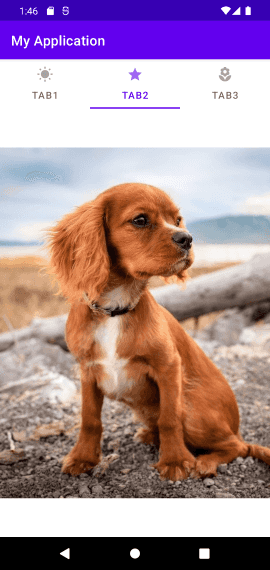
app:tabMode="scrollable"/>7. Tab에 Icon 추가
다음과 같이 Tab에 Icon을 추가할 수도 있습니다.
 '
'
Icon을 추가하는 방법은 TabLayoutMediator를 구현할 때, Tab의 Icon 설정도 함께 구현해주면 됩니다.
private val tabTitleArray = arrayOf(
    "Tab1",
    "Tab2",
    "Tab3"
)
private val tabIconArray = arrayOf(
    R.drawable.ic_sunny,
    R.drawable.ic_star,
    R.drawable.ic_florist
)

TabLayoutMediator(tabLayout, viewPager) { tab, position ->
    tab.text = tabTitleArray[position]
    tab.icon = getDrawable(tabIconArray[position])
}.attach()
8. 정리
ViewPager2와 함께 TabLayout을 구현하는 방법을 간단히 알아보았습니다. 샘플 프로젝트는 GitHub - TabLayoutExample에 업로드했으니, 이해가 안되는 부분이 있다면 코드를 확인해주세요.
Related Posts
- Android 14 - 사진/동영상 파일, 일부 접근 권한 소개
- Android - adb push, pull로 파일 복사, 다운로드
- Android 14 - 암시적 인텐트 변경사항 및 문제 해결
- Jetpack Compose - Row와 Column
- Android 13, AOSP 오픈소스 다운로드 및 빌드
- Android 13 - 세분화된 미디어 파일 권한
- Android 13에서 Notification 권한 요청, 알림 띄우기
- Android 13에서 'Access blocked: ComponentInfo' 에러 해결
- 에러 해결: android gradle plugin requires java 11 to run. you are currently using java 1.8.
- 안드로이드 - 코루틴과 Retrofit으로 비동기 통신 예제
- 안드로이드 - 코루틴으로 URL 이미지 불러오기
- Android - 진동, Vibrator, VibrationEffect 예제
- Some problems were found with the configuration of task 에러 수정
- Query method parameters should either be a type that can be converted into a database column or a List
- 우분투에서 Android 12 오픈소스 다운로드 및 빌드
- Android - ViewModel을 생성하는 방법
- Android - Transformations.map(), switchMap() 차이점
- Android - Transformations.distinctUntilChanged() 소개
- Android - TabLayout 구현 방법 (+ ViewPager2)
- Android - 휴대폰 전화번호 가져오는 방법
- Android 12 - Splash Screens 알아보기
- Android 12 - Incremental Install (Play as you Download) 소개
- Android - adb 명령어로 bugreport 로그 파일 추출
- Android - adb 명령어로 App 데이터 삭제
- Android - adb 명령어로 앱 비활성화, 활성화
- Android - adb 명령어로 특정 패키지의 PID 찾기
- Android - adb 명령어로 퍼미션 Grant 또는 Revoke
- Android - adb 명령어로 apk 설치, 삭제
- Android - adb 명령어로 특정 패키지의 프로세스 종료
- Android - adb 명령어로 screen capture 저장
- Android - adb 명령어로 System 앱 삭제, 설치
- Android - adb 명령어로 settings value 확인, 변경
- Android 12 - IntentFilter의 exported 명시적 선언
- Android - adb 명령어로 공장초기화(Factory reset)
- Android - adb logcat 명령어로 로그 출력